一:新建web工程,spring001
忽略
二:添加springframework依赖jar包
将dist下的jar全部加进去 然后另加一个commons-logging.jar
三:修改web.xml
<servlet>
    <servlet-name>springMVC</servlet-name>
    <servlet-class>org.springframework.web.servlet.DispatcherServlet</servlet-class>
    <init-param>
        <param-name>contextConfigLocation</param-name>
        <param-value>/WEB-INF/config/springMVC.xml</param-value>
    </init-param>
    <load-on-startup>1</load-on-startup>
</servlet>

<servlet-mapping>
    <servlet-name>springMVC</servlet-name>
    <url-pattern>/</url-pattern>
</servlet-mapping>
默认DispatcherServlet会加载WEB-INF/[DispatcherServlet的Servlet名字]-servlet.xml配置文件, 本示例为WEB-INF/springMVC-servlet.xml 默认路径为WEB-INF下,也可修改为如下配置
<init-param>
    <param-name>contextConfigLocation</param-name>
    <!-- <param-value>classpath:conf/springMVC.xml</param-value>  -->
    <!-- <param-value>classpath:/conf/springMVC.xml</param-value> -->
    <!-- <param-value>classpath*:/conf/springMVC.xml</param-value>  -->
    <!-- 以上三种形式也可以 -->
    <param-value>classpath:conf/springMVC.xml</param-value>
</init-param>
四:添加springMVC配置文件
<?xml version="1.0" encoding="UTF-8"?>
<beans xmlns="http://www.springframework.org/schema/beans"
    xmlns:xsi="http://www.w3.org/2001/XMLSchema-instance" xmlns:p="http://www.springframework.org/schema/p"
    xmlns:context="http://www.springframework.org/schema/context"
    xmlns:mvc="http://www.springframework.org/schema/mvc"
    default-lazy-init="true"
    xsi:schemaLocation="
    http://www.springframework.org/schema/beans
    http://www.springframework.org/schema/beans/spring-beans-3.0.xsd
    http://www.springframework.org/schema/context
    http://www.springframework.org/schema/context/spring-context-3.0.xsd
    http://www.springframework.org/schema/mvc
    http://www.springframework.org/schema/mvc/spring-mvc-3.0.xsd
    ">

    <!-- 默认扫描的包路径 -->
    <context:component-scan base-package="com.itmyhome" />

    <!-- 添加注解驱动 -->
    <mvc:annotation-driven />

    <!-- 定义跳转的文件的前后缀 -->
    <bean id="viewResolver"
        class="org.springframework.web.servlet.view.InternalResourceViewResolver">
        <property name="prefix" value="/" />  <!-- 默认放在WebRoot下 -->
        <property name="suffix" value=".jsp" />
    </bean>
</beans>
PS:<context:component-scan base-package="com.itmyhome" />
base-package后的内容只是包路径,千万不能把类名也写出来 比如com.itmyhome.Login
否则会报如下错误
警告: No mapping found for HTTP request with URI [/spring001/login] in DispatcherServlet with name ‘springMVC’
五:后台Action
package com.itmyhome;

import org.springframework.stereotype.Controller;
import org.springframework.web.bind.annotation.RequestMapping;

@Controller
public class Login {

    @RequestMapping(value="login")
    public String login(){
        System.out.println("*******已经进入*********");
        return "welcome";  //即返回welcome.jsp
    }
}
六:返回JSP
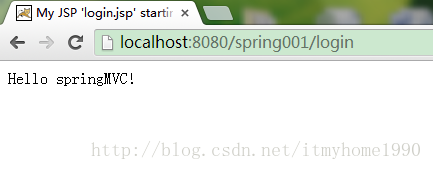
新建welcome.jsp 里面随便写点内容 如:Hello springMVC! 最后在浏览器中输入地址 验证 如图:
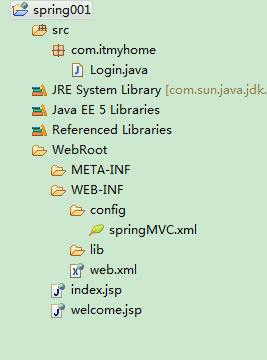
工程目录如下: